Though the rosary is technically a prayer, we use a tool (called the rosary) to keep track of the prayers we use in meditating upon the mysteries of Christ’s life. This post explores how to grow a rosary. Of course, we don’t plant a bead or a chain and harvest a rosary: crucifix, chain, beads and all. But we can grow a rosary if we really desire to. (If you’d like to learn more about the history of the rosary, you can visit this link.)
Living in Wisconsin, I had never heard of “Job’s Tears” until perusing a Baker’s Creek catalog while planning my garden one year. Native to Southeast Asia, the plant’s scientific name is actually Coix lacryma-jobi. There are many common names for the plant, including “Coix seeds” and “Adlay,” just to name a couple. Grown throughout China, Malaysia and India as a grain, it eventually made its way to the United States where it became a naturalized plant in the southern United States. While as far as we know, the seeds were used for beads and grains dating back to roughly 4000 B.C., they didn’t gain the name “Job’s Tears” until the Middle Ages when Arabs named them such because of their teardrop shape, reminding them of Job, whose story is in the Quran and originates from Holy Scripture, and using the beads for prayer beads.
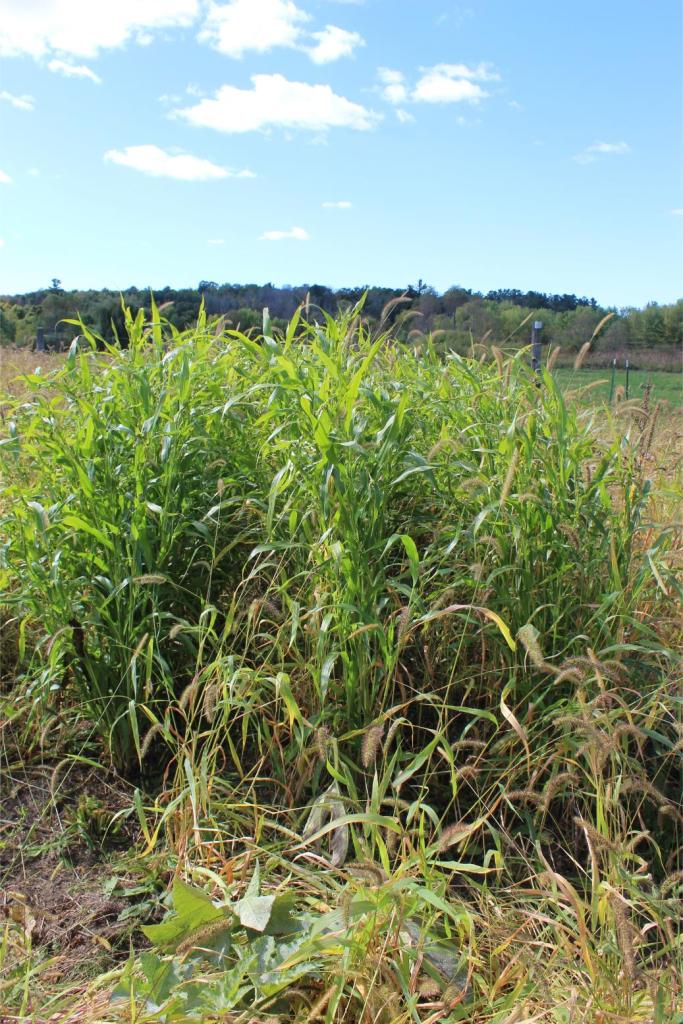
There are multiple varieties of this plant, of which one is primarily grown for beadmaking because of its hard outer shell, and another for grain, having a softer shell. I’ve read that this grass can be grown as a perennial in Louisiana, or at least that it reseeds well. I have read that the shells can be dyed different colors, but I have yet to experiment with that, and I am unsure if that is only possible with the softer, whiter variety. We grew Coix lacryma-jobi var. lacryma-jobi. The shells are a light blue-grey or lavendar color when dried, and the plants can grow to be over 4 ft. tall.
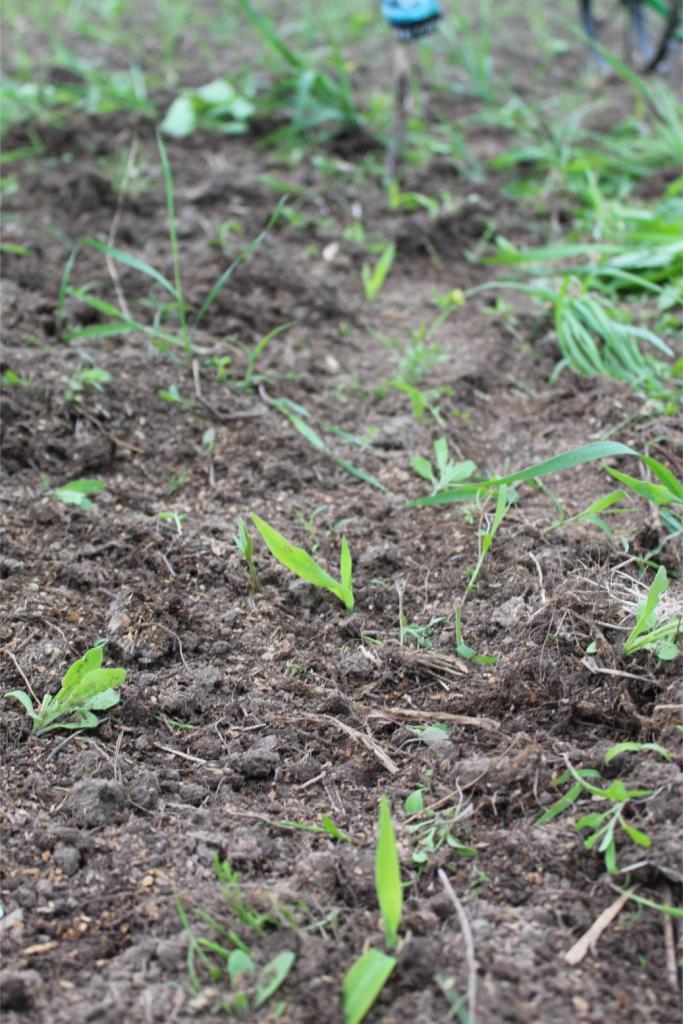
I think all but one of the seeds we planted grew, and I was really impressed by the overall size of the plants. A single seed produces numerous shoots of grass. The smallest plants may have just barely reached 4 ft., but others were closer to 5 ft. As the plant first germinates, it looks like corn, so I was surprised to see so many shoots later develop from the ground, probably 15 on average. Soaking the seeds or watering well and consistently after planting can help to promote germination at about 7 days, but if you don’t (like me) it can take upward of 28 days. I had given up hope that these would grow since I neither watered or soaked the seeds prior to planting. We had a very dry spell after I planted the seeds, and I had too many other things to attend to, and kept hoping we’d get more rain. I was pleasantly surprised when essentially every seed germinated. (We planted about two packets of seeds worth from Baker’s Creek, which I believe ended up being 65 seeds.)


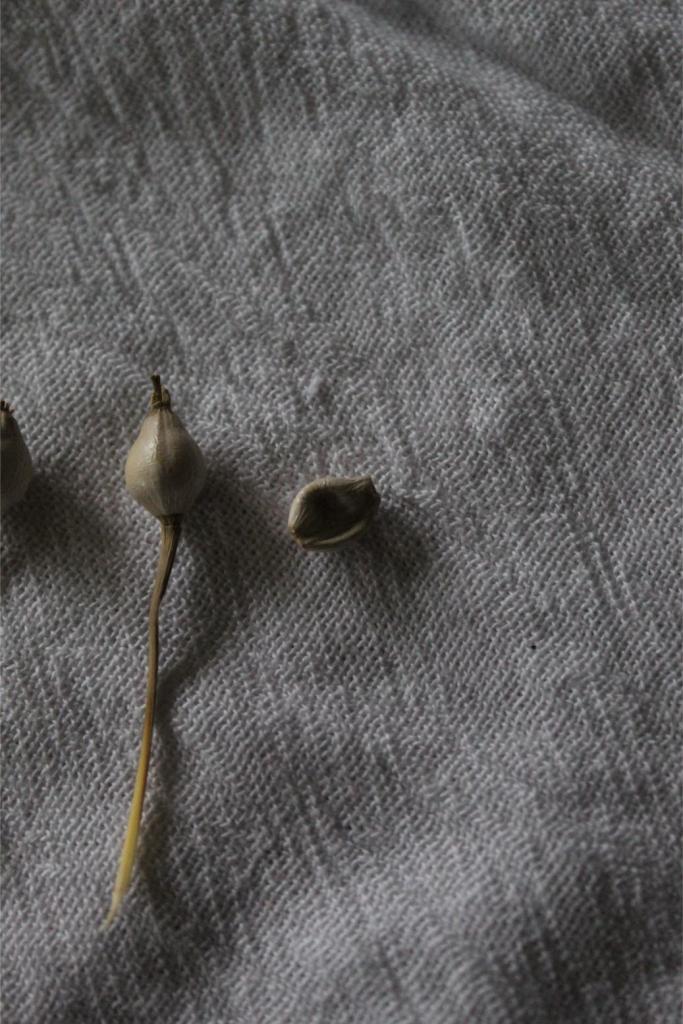
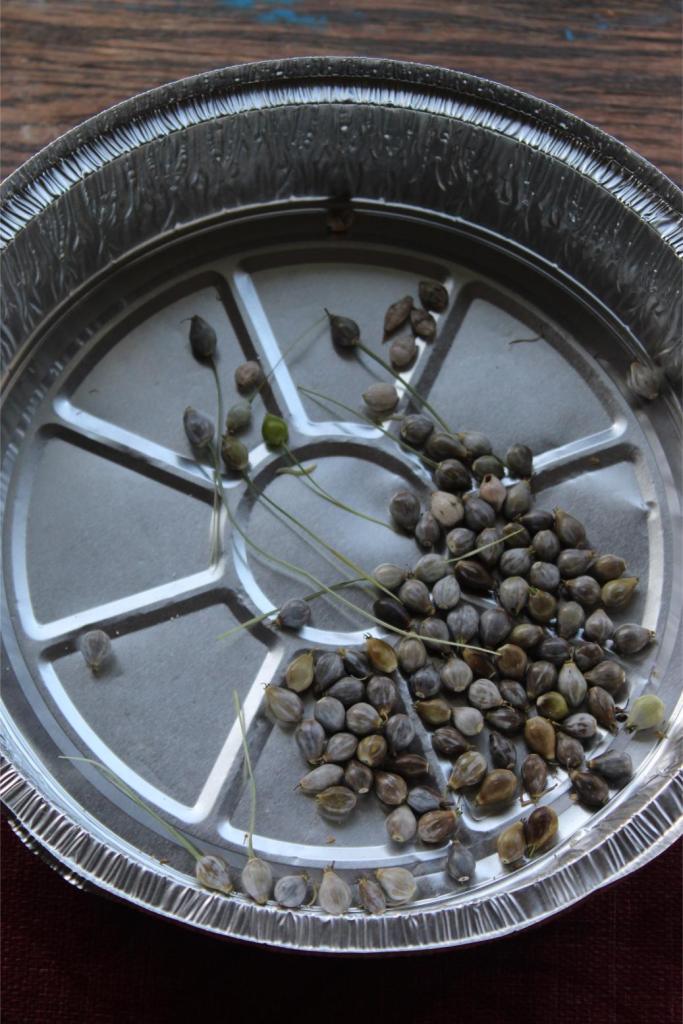
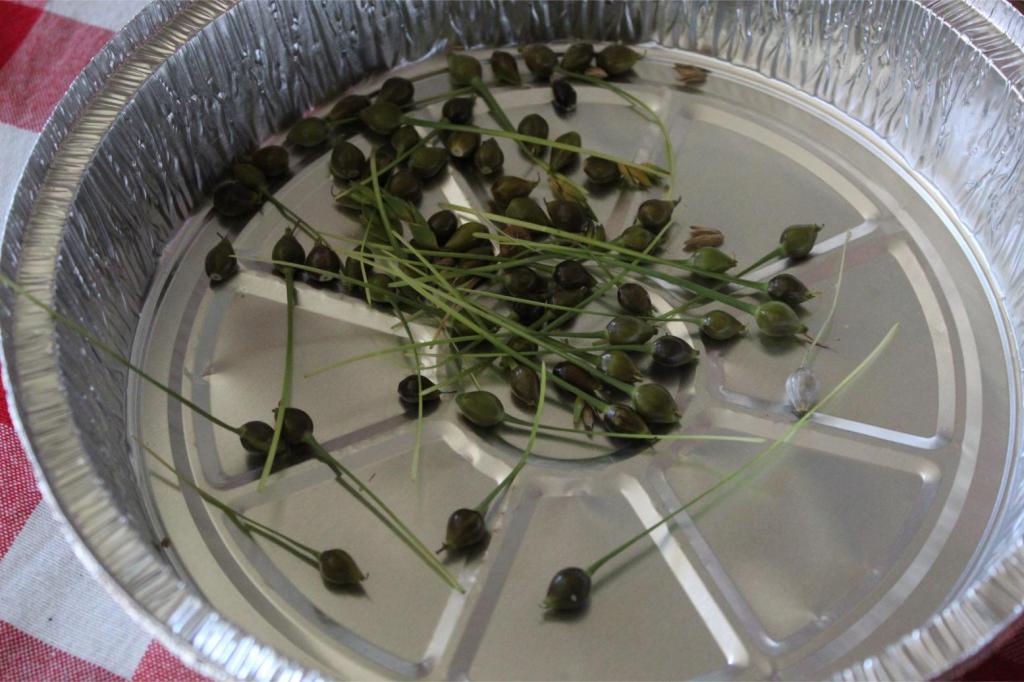
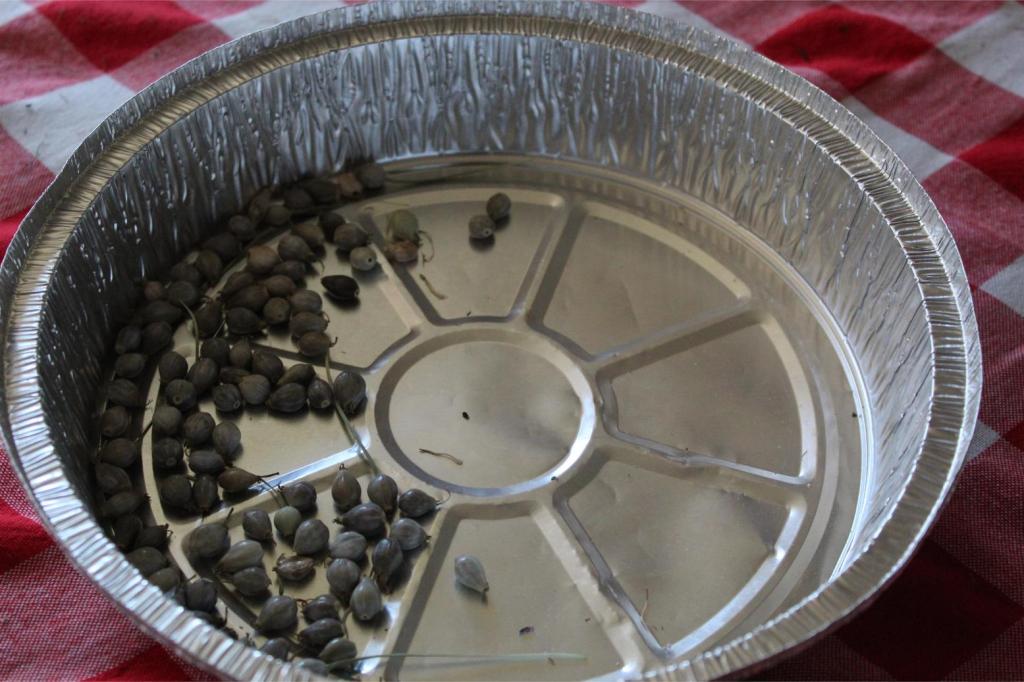
Once September arrived, I checked regularly for signs of readiness so I wouldn’t be too late on harvest. Around the end of September, I finally started to see changes in the color of the seeds from the green or yellow-green to a brown or purplish-black color. Initially, I only plucked the seeds that had begun to change color, but after a week, I cut down several plants to dry. By the end of October, all plants were harvested. Meanwhile, I experimented to determine best cleaning method and timing.
Some sources said to harvest the seeds a little at a time, others claimed harvesting while green was acceptable, and others said to let the entire plant dry out. Video of harvest of the seeds for grain purposes show it being harvested when the grass is completely dried out. I had initially read to let the seeds dry out completely, but they became more difficult to clean the harder the grain became. I tried cleaning out green seeds, but they were too milky. Eventually, I tried the seeds that were black, maybe with a little bit of greying happening, and found that this was a good point to clean the seeds.


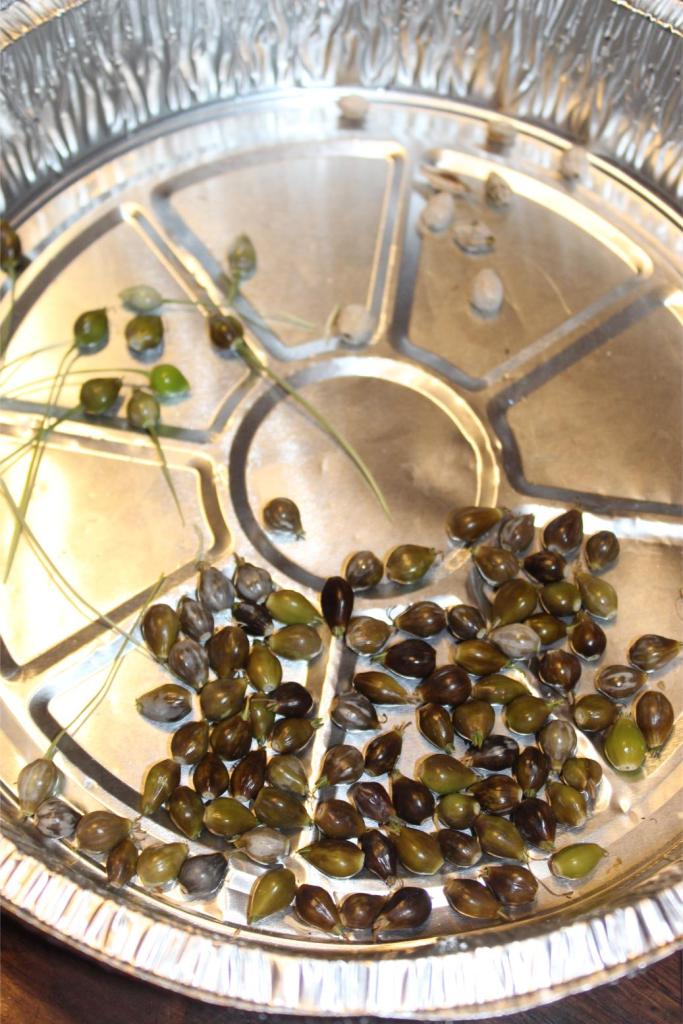
The seeds have a natural hole that runs through them, but according to my research the seed needs to be hollowed out in order to prevent the beads from rotting or getting moldy. I didn’t intentionally play around with this, but I did leave some black seeds in a sealed plastic bag and noticed that they began to mold. We experimented with seed dryness to determine the best stage for cleaning seeds. If you harvest a green seed that is hard, the inside will still be milky as the grain develops. The milkiness has an almost talc-like consistency as it dries, and it was incredibly difficult to clear the seed out completely. As the seeds become drier, the milkiness goes away, but the grain itself becomes harder, which presents a challenge. Getting the chunks of grain out of the shell becomes more difficult as the grain hardens.
There really didn’t seem to be an easiest way to clean the seeds, and though I expect that some amount of skill in this process develops over time, it took a good 7-20 minutes per seed to clean. We tested a variety of tools to clear them out, but the thing I preferred most was one we unintentionally made. We put each bead onto a jewelry eye pin as we went so we wouldn’t mix the finished beads with the unfinished, and so we could gauge our progress. As I clipped the pins down to length, I was left with a piece of pin that was about 1 and 1/4 inches long. Cutting the wire produced a flattened end, which proved to be effective at chopping the grain and scraping the walls of the shell.
The Jobs Tear is a monocot and consists of a hull, bran, endosperm, and germ. The hull is what will become the bead. The bran is brown and papery, and can be tricky to remove. The endosperm ranges from milky to hard, depending on the dryness of the seed at the time of cleaning. Soft, but firm is the most desirable for ease of cleaning. The germ is harder and can be difficult to remove, and becomes more difficult to remove as the seed dries out. We did attempt to grind the inside of dry seeds with a Dremel, but found it ineffective as well as challenging.
After removing what feels like most of the material from the shell, we blow into the seed from the bottom (rounded) end to make sure everything is cleared. This helps to loosen material and push it towards the tip, making it easier to find and remove additional materials. This process does take a good bit of focus, and can cause a bit of cramping in the hands. A standing magnifying glass may be helpful for those who require reading glasses.
A single plant will easily produce enough seed to make a single rosary, so having planted as many seeds as we did, we grew enough to make quite a few rosaries. But having discovered the difference in difficulty of cleaning depending on the dryness of the seed, we realized we were somewhat constrained in our ability to make rosaries. Storing dark purple/black seeds in an unsealed, but loosely closed plastic bag prolonged the dry time of the seeds, giving us at least a week of dry-time for the seeds. We did not attempt to freeze the seeds while black, but that may help to extend the amount of time the seeds are workable. The seeds do not all ripen at the same time, so that also extends the window of time for cleaning. Seeds harvested and left to the open air were workable for up to 3 weeks, at which point, they became incredibly difficult to fully clean.


We harvested whole plants at a time and hung some to dry. We harvested ripe seeds from the plants until they were too dry. The plants are useable for dried arrangements, and we were able to make a few for Hallowtide. The tear-shaped seeds seemed especially fitting for the Church Suffering on All Souls Day.


Actually assembling the rosaries was the easy part. Cleaning the seeds takes hours. It’s a slow process, and something good to do while visiting with friends, listening to a podcast, or watching a movie. We probably averaged an hour per decade, which means a rosary takes close to 6 hours total to make. This is a very good project for doing with a friend or family member, and has the added benefit of making it feel like it goes faster (even though it certainly doesn’t). Though the process is slow, I would highly encourage others to take on this project. We had a group of friends (all girls), ages 7-14 work on cleaning beads while watching a movie, and nearly all of them sat through the whole movie to work on making chaplets. As it was their first time doing this, they got anywhere from 3 to 6 beads completed (we had additional beads cleaned out ahead of time). They were also assembling the chaplets, which was more skills learned and took a portion of the time.
If space for growing seeds is a concern, I would just grow fewer of them. Four plants should provide enough seed to make several rosaries. I believe these can be grown in pots. Just keep in mind the overall height is upward of 5 feet.
We ordered crucifixes and some Sacred Heart rosary center medals from Beattitude Gifts on Etsy, and we purchased chain and eye pins from the local Hobby Lobby and Walmart. We used a pair of jewelry plyers from Walmart and a pair of small orthodontic wire cutters to cut the chain. (A strong enough wire cutter should work just fine.) We made our own jump rings from the pieces of the eye pins that we cut off, and we used the scrap pieces of the eye pins for cleaning out the seeds.

A few people I have talked to about this project have speculated if there are ways to make the process of cleaning seeds go faster, and while there may be, I think one of the benefits of working on a task like this is that it forces us to slow down. It reminds us that we live in an age where everything comes pre-done for us. Most people make rosaries with beads they’ve purchased, and yes, it is faster, but faster was never the point. People used to carve and engrave things by hand, but today many use computers to complete the same tasks. Lace was once exclusively made by hand, and today we can purchase it by the bolt or spool. The excitement I feel about these rosaries is nothing compared to my favorite rosary. Each bead is a little prayer in itself. I’ve thought about who will use these to pray. And I’ve spent time with people I love! Sure, maybe I could use all of the beads with a “better” method. I could make more rosaries if the process went faster. But I’ve invested myself into this very project, and the whole process has been one of prayer and growth in the virtue of patience.
Speed, convenience, and efficiency, while they can be good things, can cause us to be impatient, overly comfortable, and even lazy. The lure of those very things can cause us to lose out on community with others. Christ didn’t come to take the easy way. When we are assessing the projects we undertake on the homestead, there is always room to improve and make things better, and time is important, but we also didn’t take on this way of living for the speed by which we could live it. We didn’t undertake it because it was convenient, and we certainly didn’t do it because it was “efficient.” Nobody homesteads because it’s easy. We do it because we see something better in this way of life. We do it because it’s what God has called us to. Don’t be afraid of slow!
If you have any questions, let me know. I’ll do the best I can to answer them!
In Christ,
Danielle

Leave a comment